Page 1 of 1
Re-finishing Mahogany
Posted: Mon Feb 22, 2016 10:10 am
by BlueSmoke
I am getting ready to sand and re-varnish the mahogany on my 1977 SPORT 15. The previous owner did a great job on the wood in 2012 but did not keep it covered as well as he would have liked too. The topside wood needs to be sanded down completely but the bottom looks mint--not a scratch and has never seen the sun.
I am wondering if I should leave the bottom side alone and just do the sun-drenched top as well as sides? Or, should I do a couple coats on the underside? Or none at all?
I am meeting with [the previous owner] in a few week to get find out the brand and stain he used so I can match everything.
The last picture shows the good side (scratches on sides are just dust and crap and wipe off)
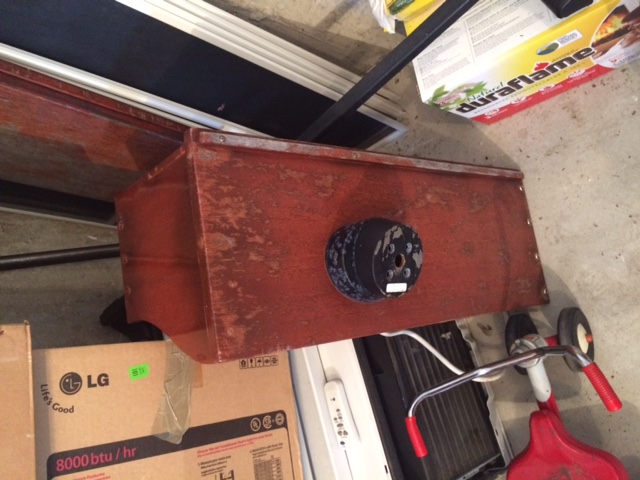
- IMG_3664.JPG (113.74 KiB) Viewed 20344 times
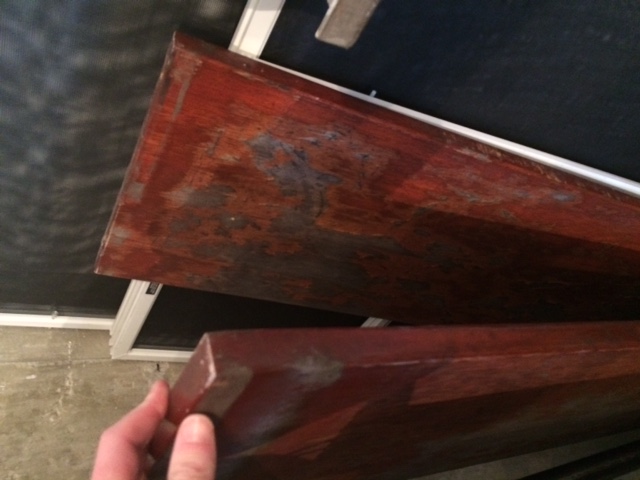
- IMG_3670.JPG (81.46 KiB) Viewed 20344 times
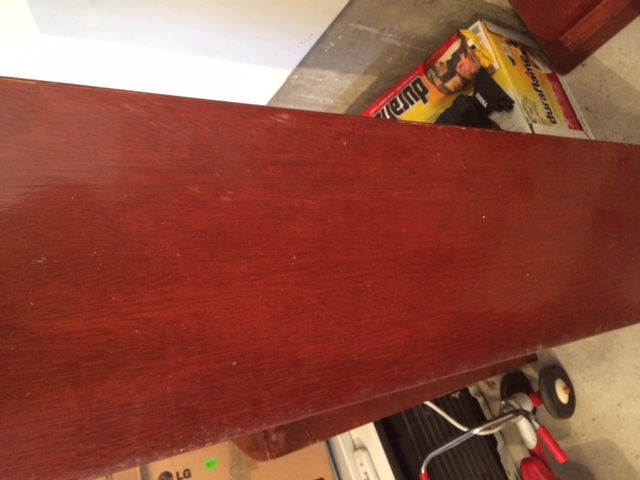
- IMG_3671.JPG (87.5 KiB) Viewed 20344 times
Re: Re-finishing Mahogany
Posted: Tue Feb 23, 2016 9:33 am
by macfam
If you have sanded both sides down to bare wood, ALWAYS coat top and bottom. If you leave one side un coated, it will absorb moisture and expand, the coated side will not. This can result in warping of the board.
On mahogany thwart seats that I have refinished, they were down to bare wood, and the first coat of Pettit Flagship varnish was cut 50/50 with Pettit 120 Thinner. Second coat also thinned about 20-25%. Then I used Flagship with multiple coats, lightly sanded, vacuumed, and tack clothed between coats. Application was with foam brush. perfection!!!
Re: Re-finishing Mahogany
Posted: Tue Feb 23, 2016 12:11 pm
by Dutchman
If you went down to the bare wood use CPES to prime and stabilize the mahogany wood before you put on many coats of Pettit or Interlux varnish. Having prepared and varnished thousands of square feet from grey, bleached and OK looking mahogany I lean towards Interlux Schooner varnish for its deep gloss and hue with CPES as a start. It is water thin easily applied and will keep the wood from bleaching and rotting and will have less maintenance(recaoting) in the future.
Read and see the history behind CPES and reasons why on this website
http://www.smithandcompany.org/CPES/index.html
Re: Re-finishing Mahogany
Posted: Wed Feb 24, 2016 11:01 am
by BlueSmoke
thanks for the infomation!
I guess I am still trying to figure out if I can leave the mint side (pic 3) alone.
If the last stain and varnish is in perfect shape on one side. Do I need to sand it down and start over or can I just hit the top peeling (sunfacing side) and edges of the board to make sure its all sealed and leave this side in picture 3 alone.
Thanks
Re: Re-finishing Mahogany
Posted: Wed Feb 24, 2016 12:37 pm
by goldstem
just do the top, exposed sides. for sides that are almost never exposed to the sun, since they are already finished, no need to sand and refinish.
every time you do this, (every couple of years, usually) you re-evaluate the unexposed surfaces.
Re: Re-finishing Mahogany
Posted: Wed Feb 24, 2016 2:20 pm
by Dutchman
BlueSmoke I don't agree with not re-finishing the "good" side as goldstem said.
Yes you don't have to go to the bare wood but at transition from bad to good you must sand more aggressively and wet sand the "good" side and when getting to the final coat of the "bad" side cover it with 2 more coats too.
Bottom line for varnished wood to look good and last thou must sand and varnish many times.
Even if you and up with a slightly different hue between bottom and top it still will be sufficiently protected.
Re: Re-finishing Mahogany
Posted: Thu Feb 25, 2016 2:53 pm
by BlueSmoke
thanks guys! I am thinking the wood would be prety good eaither way as it is in such good shape and never seen the sun covered 70% of its life. That being said the hard work is in the sanding down to bare wood, not the varnish/ rough sand repeat.
Makes sense and not that much extra effort to rough it up and add a few extra coats while I am doing it anyways and the wood is already removed, painting station set up, and brushes wet...
sanding starts on Saturday!
Re: Re-finishing Mahogany
Posted: Fri Feb 26, 2016 10:04 am
by Dutchman
Good luck and post the results
Re: Re-finishing Mahogany
Posted: Wed Mar 09, 2016 6:01 pm
by BlueSmoke
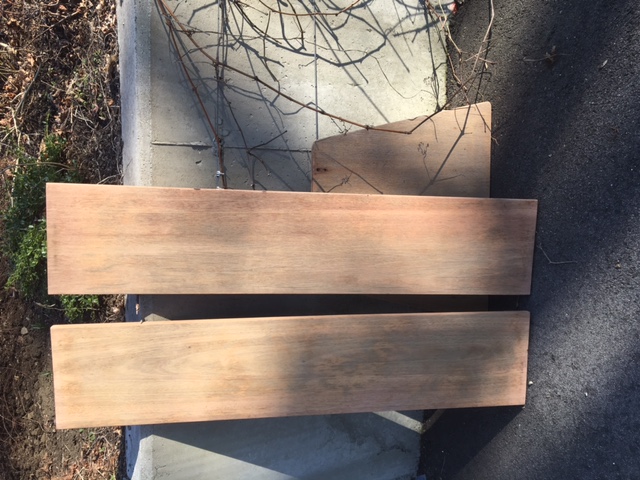
Got down to it today in the 70 heat wave in Boston!
Started with 80 grit on the belt sander - very light touch to get the old varnish off
moved to 100 on the palm then 120 on orbital.
What grit do you stop at before next step?
forgot to buy tackcloth and was getting late in day so decided to stop there.
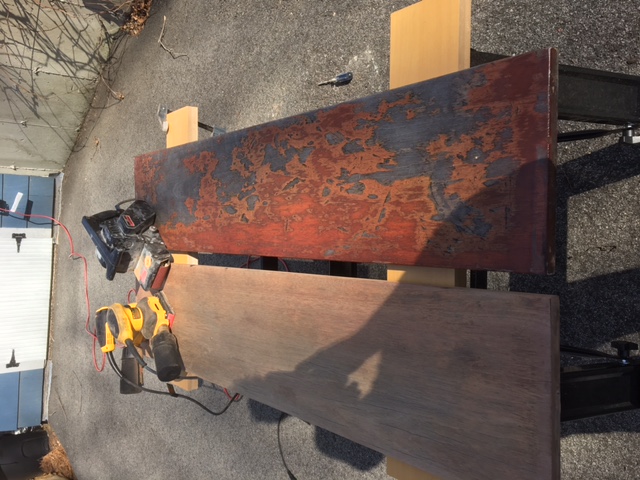
- IMG_3744.JPG (137.19 KiB) Viewed 20077 times
Re: Re-finishing Mahogany
Posted: Wed Mar 09, 2016 6:02 pm
by BlueSmoke
- IMG_3746.JPG (141.47 KiB) Viewed 20077 times
after pics with anchor hatch too. not pictured is side console.
Re: Re-finishing Mahogany
Posted: Fri Mar 18, 2016 2:24 am
by Buckda
You can start the finish after 150 grit or 180 grit sanding. Be sure to wipe the board down with a tack cloth before adding finish. Then 220 grit between coats if you let it cure (see instructions on the can). 220 grit before the final topcoat. Since you've taken it down to bare wood, you will want many coats of varnish. I'm talking, like, 10 to 12 coats.
Re: Re-finishing Mahogany
Posted: Fri Mar 18, 2016 11:04 pm
by BlueSmoke
8 was the number I was going for so will see how it looks after 8 and go from there.
I am varnishing over some screw holes and plan on drilling a few more when I move the seat on top of the risers. My question is what do you recommend I put on the screws or wood to seal it while putting screws into it?. please keep in mind some day I will need to remove these screws.
Thanks!
Re: Re-finishing Mahogany
Posted: Sat Mar 19, 2016 8:12 am
by macfam
The last slide of this attachment shows Stainless Steel wood screws(Phillips) with SS finish washers, and SS flat washers to prevent the finish washers from "cutting into varnish" preventing water to soak the wood, turning it black.
I prefer this method, but use NYLON flat washers vs. stainless steel flat washers. Ends up looking great!
http://smg.photobucket.com/user/HAPPYJIM/media/Ipe%20for%2013%20footer/MVC-006S.jpg.htmlIf you use the correct size screw, you shouldn't have to put anything on the screws to hold them. If I HAD to use something, I'd probably pick something "clear" or light colored.
For some projects, I've wet the hole in the hull with a bit of water, and with a toothpick, inserted just a tiny dab of Gorilla Glue, place board, insert screw and tighten. Gorilla Glue EXPANDS, so just a dab. It is tough stuff and water proof so far.
Re: Re-finishing Mahogany
Posted: Sat Mar 19, 2016 9:38 am
by BlueSmoke
Thanks! finished product looks great!
Did you drill the thwart seat and riser out first? any tips on that process would be helpful!
One concern is my rails are not 100% vertical, I mean they are pretty close but also 30 years old...
Re: Re-finishing Mahogany
Posted: Sat Mar 19, 2016 12:59 pm
by macfam
You can set your wood in place after varnishing(but COMPLETELY dry for several days). Pre-drill and screw in place, using your SS finish & nylon washers.
Not exactly sure what you mean about the rails not being vertical. Could you post a couple of pics?
Re: Re-finishing Mahogany
Posted: Thu May 05, 2016 10:49 am
by BlueSmoke
Re: Re-finishing Mahogany
Posted: Mon Apr 26, 2021 1:15 pm
by Schuyler84
I have previously owned a 1970 Sport 13 as well as a 1987 Super Sport 13 and had experienced the problem of the stainless-steel finish washers cutting into the finished wood surfaces. This situation eventually would lead to moisture entering the wood in these locations. I was unaware of any solution to this concern until I recently purchased and began restoring a 1988 Super Sport 15 which was completely original and unaltered. When disassembling the boat's mahogany interior components, I noticed that 0.187 x 0.625 x 0.062 nylon washers had been installed between the stainless-steel finish washers and wood surfaces. It appears that Boston Whaler began installing these nylon washers commencing with 1988 models--a great solution.
The effectiveness of these washers was evidenced in the condition of the wood beneath these washers. That said, I did not have these nylon washers installed beneath the finish washers securing plywood instrument panel to the console, was unable to source them locally or through marine suppliers. I was however able to obtain these nylon washers in bulk (smallest quantity is 100) from E&T Fasteners of Clearlake, CA. Hopefully, this post will be of use to others who may be restoring the mahogany interiors of their Boston Whaler boats.
