ContinuousWave
 Whaler
 Moderated Discussion Areas
ContinuousWave: Whaler Repairs/Mods
Raising the RPS Revisited
Moderated Discussion Areas
ContinuousWave: Whaler Repairs/Mods
Raising the RPS Revisited


search | FAQ |
profile | register | author help
|
|
ContinuousWave Whaler Moderated Discussion Areas
ContinuousWave: Whaler Repairs/Mods
Raising the RPS Revisited
|
| Author | Topic: Raising the RPS Revisited |
| Salty Tricks |
 posted 01-03-2006 11:49 AM ET (US)
posted 01-03-2006 11:49 AM ET (US)  
I have done a search on raising the RPS on my 1984 Montauk. Almost all [modifications] are about raising it from the deck. Anyone do it by blocking up the seat bottom? I would like the added height and would install a drawer under the seat that will clear my Pate tank. |
| ratherwhalering |
posted 01-03-2006 02:40 PM ET (US)
Salty, the major problem with this is the stainless steel swing back arms. The top of the RPS legs are precisly molded to accomodate the 7/8-inch tubing. If you add teak/starboard to the top of the RPS legs, instead of the base, you will need to recreate the cut-outs for the swing arms. It just seems easier to do this from the bottom. If I were going to raise my RPS from the top of the legs, I would take the legs into TAP Plastic and have them cut the extensions from Sea Board, and expect a labor charge of $10-20 plus materials. Those guys are amazing when it comes to cutting and molding their products to your design specifications. |
| ratherwhalering |
posted 01-03-2006 02:40 PM ET (US)
Salty, the major problem with this is the stainless steel swing back arms. The top of the RPS legs are precisly molded to accomodate the 7/8-inch tubing. If you add teak/starboard to the top of the RPS legs, instead of the base, you will need to recreate the cut-outs for the swing arms. It just seems easier to do this from the bottom. If I were going to raise my RPS from the top of the legs, I would take the legs into TAP Plastic and have them cut the extensions from Sea Board, and expect a labor charge of $10-20 plus materials. Those guys are amazing when it comes to cutting and molding their products to your design specifications. |
| Casco Bay Outrage |
posted 01-03-2006 03:57 PM ET (US)
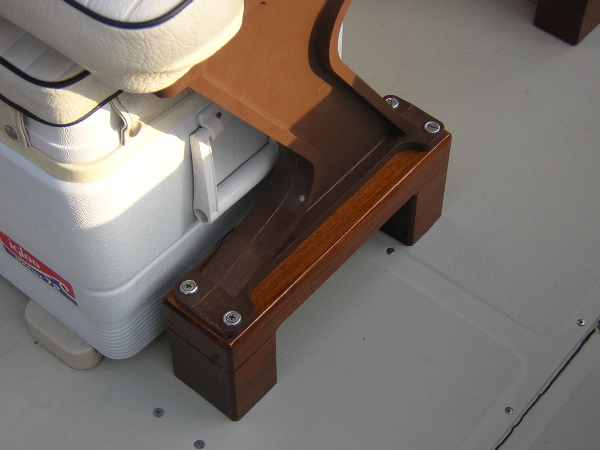
Jim Farris's did a teriffic custom riser and drawer. Here is the original thread (includes links to photos): Here is Jim's response to my email inquiry on the project. "...My drawer is attached to the seat bottom, not to the legs. I built a framework that included 2 vertical members that the drawer slides attach to. The back of the drawer is the finished back that faces the stern. The drawer is constructed out of solid mahogany. Boater’s World caries a latch like the one I used (part # 32-974-0021). When you close the drawer it is latched securely. One of my suppliers carries the stainless steel drawer slides. The parts had to be notched to go around the stainless tubing on the bottom of the seat. It was a trial and error type fitting. The bottom of the drawer is an 1/8” plastic that use to be made by GE, but is no longer made. 1/4" plywood would work well. Some of the parts are machined to 7/8, 3/4, and 1/2" depending on it’s use. I raised my seat about 4 3/4" and made the drawer the same height as the stand-offs. I purchased long stainless steel lag bolts to secure the seat brackets to the floor. I used a little Marine Goop under the stand-offs to make it real secure. I have not had any problems with durability. I fish the Galveston Bay area as well as the Gulf of Mexico. Sometimes my boat takes a beating! The drawer is extremely handy. I keep my wallet, phone, keys, and tackle boxes in the drawer. Like I said before it also makes filling the gas tank easy. Hope this helps! Phil |
| Salty Tricks |
posted 01-03-2006 10:07 PM ET (US)
Thanks fellas! Yes I did see Jim's install...nice job. I did want to keep with a wood riser (opposed to Starboard) keeping in the theme of the teak trim I have but I thought the wood in constant contact with a wet deck would be problematic....not to mention getting scuffed quite easily with usual traffic. If I stick with the top mounted risers (spacers) on the RPS legs, I understand I would have to notch the tops for relief of the horizontal tubing. I didn't think this would pose a major problem as long as my riser height was adequate for the draw sides and back to clear the rails. I was wondering if anybody attempted this or am I not thinking of something that may prevent this approach. |
| jimh |
posted 01-04-2006 01:10 AM ET (US)
Here is some nice wood working by Jerry AKA Jechura aboard his OUTRAGE 22 SPOUTER :
|
| Casco Bay Outrage |
posted 01-04-2006 12:33 PM ET (US)
Salty - I do recall one modification that included spacers above the leg. It was to add a hinge to the seat. Can't seem to find the thread or link. . Anybody remember? He had a photo of his wife sewing all the cushions) I remember he added the blocks to the bottom of the seat for arms. |
| LHG |
posted 01-05-2006 02:27 PM ET (US)
I believe I am the originator of this idea to raise the RPS, having first done mine in 1986 on my 1986 Outrage 18, I looked into the possibility of inserting the risers under the cushion and rejected the idea. As mentioned, one of the problems are the 1/2 round grooves needed to cradle the pivot bars. I did not have the necessary tools to do this routing job. The other problem are the #14 cushion mounting screws, which go into the threaded inserts in the underside of the seat's plywood base. Using the 6" rise that I did, I found this detail and necessary 7-1/2" long screws unworkable and determined that the floor blocking was a better solution. Now, 20 years later, I still find it an excellent design. |
| LHG |
posted 01-05-2006 02:32 PM ET (US)
Here is my RPS riser design:
|
| Montauk Explorer |
posted 01-08-2006 01:15 AM ET (US)
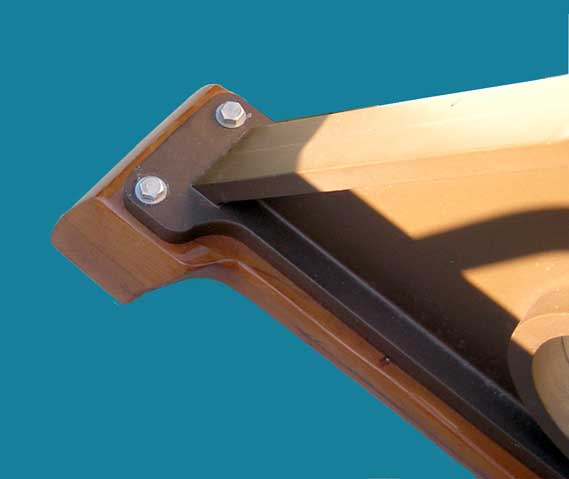
I raised mine 1 1/2" from under the seat using black starboard cut to the contour of the top of the rps. Purpose was to provide clearance to fill the 27g tempo. Came out nice, unscrewed the swing arm plate that attach to the seat back and reattached at a lower point to maintain full swing (the old holes are still covered by the repositioned teak plate). |
| ratherwhalering |
posted 01-08-2006 01:49 PM ET (US)
Montauk Explorer, would you mind posting a picture? |
| whalerajm |
posted 01-10-2006 10:07 PM ET (US)
Me too...1975 Montauk with 2.5 in Risers to fit Tempo Ulta PBW13 gas tanks...I used Trex, stained with gun stock oil to match teak RPS... http://pg.photos.yahoo.com/ph/andycq/detail?.dir=7ccd&.dnm=4a3a.jpg&. src=ph |
| Montauk Explorer |
posted 01-13-2006 09:26 PM ET (US)
rather- the montauk is under wraps for the winter- if you still need it in march I'd be glad to. what is it that you need a picture of- the starboard or the swing arm attachment? |
| ratherwhalering |
posted 01-13-2006 11:27 PM ET (US)
Kinda both. I was considering the same modification, but hadn't thought about lowering the swing arm brackets. I was going to cut the starboard to accomodate the stainless tubing, but would like to get a look at your solution before I dive in. No rush, if you remember in the spring, let me know. Thanks, --Rob-- |
| Montauk Explorer |
posted 01-15-2006 09:23 PM ET (US)
Rather- I left the swing arms in the rps notch. The starboard goes on top of the rps risers over the swing arms. Doing it this way requires moving the side plate up to retain the full front to back travel of the seat back. Moving the plates up is easy- cut your starboard use the rps legs surface a a pattern shape and to locate the screw holes. (now you need 3" st stl screws to fasten seat to the rps). set it all up with the side plates detached. Re- fasten them using the same hardware- placing the seat in the forward or aft position will determine where they mount on the seat back. The new position for the side plates is only 1-1/2" lower on the seat back. ( the original mounting holes are still covered. |
| |
Powered by: Ultimate Bulletin Board, Freeware Version 2000
Purchase our Licensed Version- which adds many more features!
© Infopop Corporation (formerly Madrona Park, Inc.), 1998 - 2000.